Showing posts with label plastic canvas. Show all posts

Tuesday, July 12, 2011

How to: Make Celtic ring-fort


Having a limited budget purchasing a fancy Celtic ring-fort from the various manufacturers is out of the question, so I went about making one of my own. First I needed to make one that could be taken apart after it's use and stored away.
     I drove around to several constructions sites and found in the dumpsters thrown away styrofoam, lots of it in big sizes. There are many different types of the foam material. The majority of the one I found has little pellets welded together and the pellets can be of various sizes. Once of the things I found about it was that with clever painting the pellets could be used as rocks or masonry.
     I found around the house round objects I could use to trace around. I traced three circles on the foam and then cut them out. In hind sight I should have cut farther away from tracing lines, then cut each layer beveled, tapering to the palisade walls.


Cutting the foam is very messy, remember to cleanup the mess, don't leave it around for someone else to cleanup (say one's wife).


I then used Elmer's tacky glue to adhere the three circles on top of each other.Make sure the glue used is safe for styrofoam, many glues will melt the foam. I then cut the circle into three sections and cut two small holes for magnets (make sure the polarities are right).


I then painted the bottom two levels a dark brown for earth, and the top layer gray for rocks. I went to the market and purchased a pack of 50 bamboo skewers for cooking for $2.25 USD. It took three packs to form around the top of the rings to be used for palisades, I used about a third of the length of the stick.The bamboo I could stick into the foam, later I glued them into place for added strength.


I then went to the hobby store and bought a box of 1000 Popsicle sticks, cut off the round ends and glued them down behind the palisades as a catwalk. Using brown paint wash over the palisade walls and walk ways. Don't worry if the painting isn't even. The left over bamboo and sticks can be used for other projects. Using left over plastic canvas from the round hut project, I cut off a couple lengths to look like ladders, and painted a different brown color.

Last step is covering the earth area of the ringfort with a water/glue dilution and use pre-painted sawdust, sand, or real dirt, and sprinkle over area liberally. Turn upside down and lightly shake off excess, then spay over with like solution to make shure it sticks. (I haven't done this yet.)  
 
Using the left over bamboo and Popsicle sticks, balsa wood and broom bristles from the round hut project, I built a guard tower over the enterance of the fort. Still deciding how to make a gate.


Monday, June 20, 2011

How to: Make round huts

During the wait in saving money for a lighted magnifier and another set of miniatures, I decided to design and create an Irish ring-fort and buildings out of free stuff. Following is how I went about creating wattle & dob huts with thatch roof out of mostly free stuff.


Step 1 : I obtained a couple 8x11 sheets of card stock for making the roof. I bought a sheet of plastic canvas at the hobby & craft store in brown for .56 cents and a 36 inch piece of balsa wood for .29 cents. Went to the Dollar Store and bought a broom (use the bristles for thatch). Out of the trash I salvaged a hot chocolate and orange juice can, both made of paper/cardboard (just washed them out). Looked at various kitchen ware for something circular that I could draw a circle with in the size desired. Make sure roof extends beyond walls.

Step 2 : Using a cereal bowl to draw around to make a circle on the card stock. Cut the card stock circle out with scissors, using two sheets (to make the roof more stable). Drew a radius line from edge to middle of circle and cut the line. Then bent card stock into a cone and glue, when dried, paint a dark color (black, brown gray). Cut a hole in the tip of cone. Small can used as a small storage hut, thus didn't have hole in top.

Step 3 : Taking a miniature figure (28mm) to measure height of hut and doorway, and drew lines. Taking a Dremel circular tool (or xacto knife, scissor), cut the height of the can, and having done so cut the doorway. I used the half of the can with the metal bottom which I shall brush diluted glue on and dump sand/dirt for flooring, then spray diluted glue on dirt to help it stick.

Step 4 : Paint the cut can the color desired. For a more plaster look, use a mixture of flour, glue, salt, & water (google web for correct recipe). Taking an xacto knife cut a couple of holes in which to glue a piece of plastic canvas over hole from inside the can. This makes the hole look like it needs repair and has a wattle & dob look (to me). Depending on color of paint for hut, the canvas may need to be painted a different color.


Step 5 : Cut balsa wood to length as the door posts and length of wall posts for height around the can (about 3 or 4). Glue them on the quarter areas of circle on outside of can (if re-moveable roof, have inside posts also). Paint the posts.

Step 6 : Placing the card stock roof on the can top, cut the bristles from the broom head, and then cut them to length needed for the roof. Glue small sections and placed down bristles. Layer them to look more like thatch roofs in England (sort of). Use a lot of white glue which dries clear. Using a washing technique in brown, paint the roof. Don't forget to paint the hole and thatch around the hole a black color, for smoke damage. If roof isn't to be removed, glue down.

 Step 7 : The various photos viewed on the web of Irish huts didn't show any doors so I used a cut piece of cloth to hang down. I then used blue paint and drew a few Celtic symbols on hut outside wall.

 
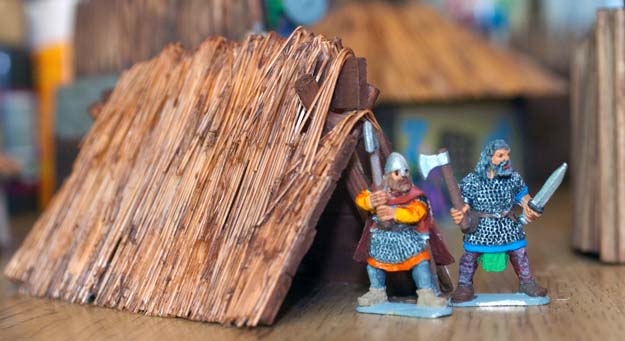
Step 8 : To make A-frame hut, take two round sticks and create an X on one end and glue. Using popcycle sticks, cut the round ends off, and laid them against the X posts, the X posts being one on each end. After gluing planking up stick sides, painted desired color. Then cut bristles to size desired and glue them down and wash with paint.